Saturday, May 4, 2013

Quilt Contest---would love your vote!

I entered this quilt over at Quilting Gallery this week.  Would love it if you would vote for me!  You can go HERE to see the quilts and then vote.  THANK  YOU!!!


Posted by Picasa

Sunday, March 24, 2013

2013 BOM

I guess it's about time I show our 2013 BOM from our LQS.  Again, this year we have the option to make the pieced blocks in 2 different colorways.  This is the pink version.

Here is the autumn colorway.  The setting is a Circle of Nine with appliqued leaves.  Will make a beautiful Fall quilt.

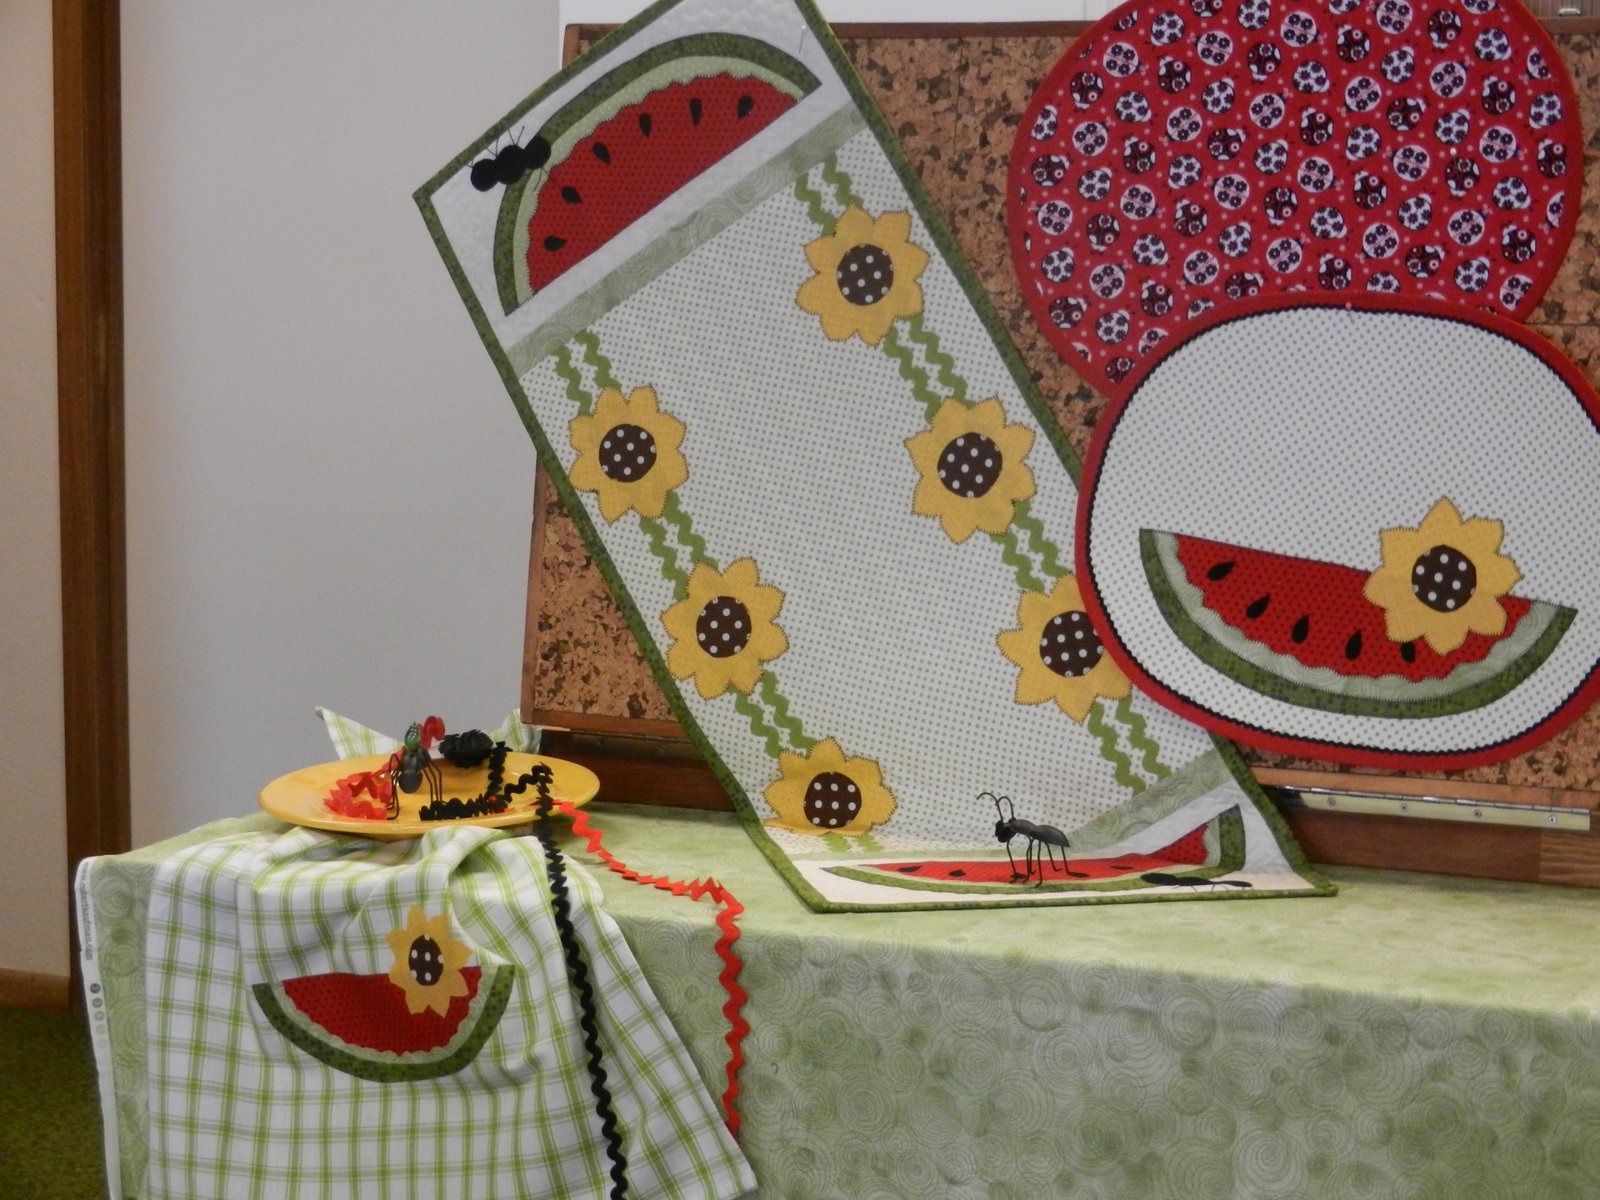
The applique "quilt" is not a true quilt this year.  We are making 3 small wall hangings.  This is the first one.  We have already made the flowers, watermelon and now are making the ladybugs in March.  I am still debating on whether I can save all my blocks and make it into a Season quilt at the end of the year.  I will have to see what the next quarter's blocks look like before I decide.

Along with how to make the blocks each month, we are given more ideas on how to add to our wall hanging.  Here are some placemats, table runner and dish cloth.

Our BOM's are a bargain compared to what I hear about other ones around the country.  We only have to pay for our first month's block ($10) and then if we bring it back finished the following month, the next pattern is FREE!  It makes being home on each second Saturday of each month a must!  If we do miss a month, we only have to pay $7 for the pattern/fabric.  We all try really hard to make our quilts be only $10!

I have a new blog post on http://rippinstitchers.blogspot.com/ if you are interested in seeing our quilt guild's happenings this month.  We didn't have many show and tells but it has been fun getting to know some new women in the valley.


Posted by Picasa

Sunday, February 24, 2013

Fons and Porter Freebies!

About a week ago and I was contacted by the Online Media Coordinator from Fons and Porter.  Am I the only one that didn't know F & P had FREE booklets to share with the world?!!!  I was asked if I would review their Log Cabin booklet for them and share what I thought on my blog.

Ok.......sure!!!

I printed the 24 pages out so I could really look at each page.  Can I just say right now that I have always loved Fons and Porter?!  I have even traveled to their store in Winterset, Iowa.  Such a CUTE town!  But this was such a nice treat.....a booklet that is really worth the color ink it takes to print it out!
The booklet tells a bit of history on Log Cabin quilts in the first couple of pages but them quickly turns into a pattern book.  All for FREE!

I count 6 FREE patterns in this little booklet!
This one has really caught my eye and is on my "someday I need to make this" calendar!

All directions are included.  The last few pages talk about binding with piping and Liz' lumpless binding.
So many pictures and great patterns!
This is a wonderful booklet for any quilter.  My daughter has been wanting to make her own Log Cabin quilt for several years now.  I am going to have to share this link with her!  You also can click on the link and sign up to get the free booklet!
http://www.fonsandporter.com/landing/free-log-cabin-quilt-patterns
Enjoy!


You can also go to http://www.mccallsquilting.com/free-modern-quilt-patterns and receive their Modern Quilt Pattern booklet too!


Posted by Picasa

Saturday, February 23, 2013

February Quilt Guild

I accidentally sent this post to my own blog but instead of deleting it I will leave it up.  If you want to "read the words" that I added, you can go to our Guild's blog.  http://rippinstitchers.blogspot.com/  As you can see I shared my Chevron quilt with the ladies.


Posted by Picasa

Friday, February 8, 2013

Emily's 2nd Quilt

My daughter-in-law finished her 2012 BOM!  She brought it over to show me after she picked it up from the quilter.  There was a bit of trouble with the borders but I am so excited for her to push on and finish!  It is big enough to go on her bed so she had a lot of fabric to push through her machine.  I am so proud of her!  The setting of the blocks was something we found online so she kind of winged how to put it all together.  No directions at all.  I was a big help.  I told her to just look at the picture and then decide how big she wanted her blocks and to go for it---after I showed her how the original was pieced together.  Her 1st quilt was a BOM too (Noah's Ark).  It is such a great way for beginner quilters to learn to sew quilt blocks plus they get a quilt at the end of the year!
 

Posted by Picasa

Friday, February 1, 2013

The quilts are back

While I was helping my son and his family move across the country this past week, my hubby picked up my quilts up from my quilter.  She did a wonderful job once again!


You can see my one block that I made when I thought I was going to use this layer cake as a sampler quilt.  I decided to use up every last bit of the cake by placing the extra on the back.  


My 2012 Valley Fabric BOM finished.  


Wanted to again use the leftovers so onto the back they went!  I'm going to say I was going for the artistic look since it is off-centered.  ;)
 

Posted by Picasa

Wednesday, January 30, 2013

Chevron quilt

What do you do with your pre-cuts?  I have several jelly rolls and a couple of layer cakes in my stash that I bought years ago when they first came on the market.  I have used a few of the jelly rolls to make sampler quilts but the layer cakes have sat untouched.  I did make one block a couple of years ago with a couple of 10" squares but then the rest of the squares have been stashed away.  Until now that is.

I don't even remember what this layer cake's name is but I have loved the fabric since I bought it.  A few months ago I saw Missouri Quilt Company's youtube video on how to make a Chevron quilt.  Looked simple enough so yesterday I pulled out the remaining squares and got to work.  The construction is very simple.  Take one layer cake square and then a contrasting color that is also 10".  Place them RST and sew 1/4" around all 4 sides.  To make this process go quicker sew in an assembly line fashion.  Sew all squares on one side, cut them apart and then sew the next side until you have sewn all 4 sides.  Cut the squares apart on each diagonal and you have 4 blocks.  Press and then put them together how you want them to look.  It wasn't until I was ready to put my blocks on my design wall that I realized I didn't have has many green blocks as I did pink.

Here was my first attempt at putting the blocks together.  Blah.


Next I tried to keep the colors together in the blocks.  Again....blah.


Finally I took everything off the design wall and started over by mixing everything up.  As you can see, I only had enough greens for one row but I like it.  
 
Now to put on the border and get it to the quilter!  A layer cake gone from my stash!  Yes!  


Posted by Picasa